Organization Profile and Branding
Configure your organization profile with basic details such as your Organization Name, Logo, Primary Contact, Regional Settings, and more.
Set Up Organization Profile
Here’s how you can set up your organization profile:
- Go to Admin View on the left sidebar.
- Click Settings on the left sidebar.
(OR)
Click Settings in the top right corner of the page. - Click Organization Profile under Organization.
- You can edit the following parameters:
- Company Logo: The logo you upload here will be reflected in all your documents. You can simply click the Upload Logo button, select the image file, and upload it.
- Preferred Size: 240px*240px with 72 DPI.
- Maximum File Size: 1 MB.
- Organization Name: You can edit your organization name entered during quick setup, if required.
- Company Address: Provide your company’s address details such as the street, city, state, zip code, and country.
- Other Details: Enter your contact details such as the phone number, fax, and website.
- Company Logo: The logo you upload here will be reflected in all your documents. You can simply click the Upload Logo button, select the image file, and upload it.

Primary Contact
Primary Contact is the main point of contact for your organization. Emails across the organization will be sent from the primary contact’s email address. You can edit or change the primary contact.
To add new organization contacts:
- Go to Admin View on the left sidebar.
- Click Settings on the left sidebar.
(OR)
Click Settings in the top right corner of the page. - Click Organization Profile under Organization.
- Click Configure Emails.

- In the popup that opens, click + Add Additional Contact.
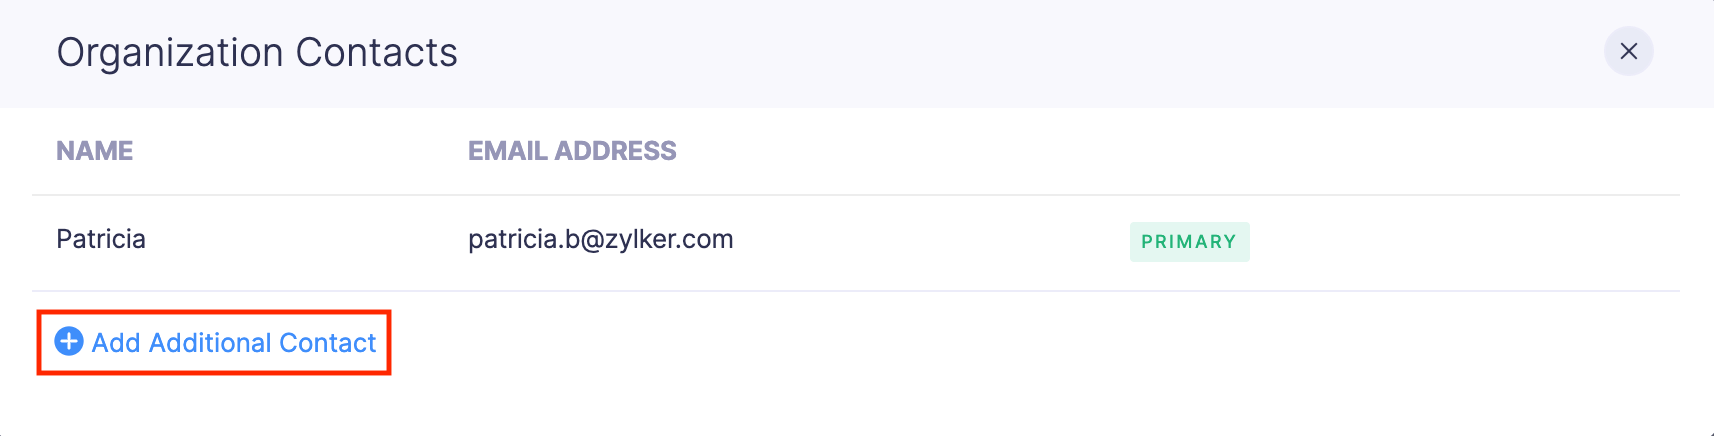
- Enter the user’s name and email address and click Save. Your new contact will be added.

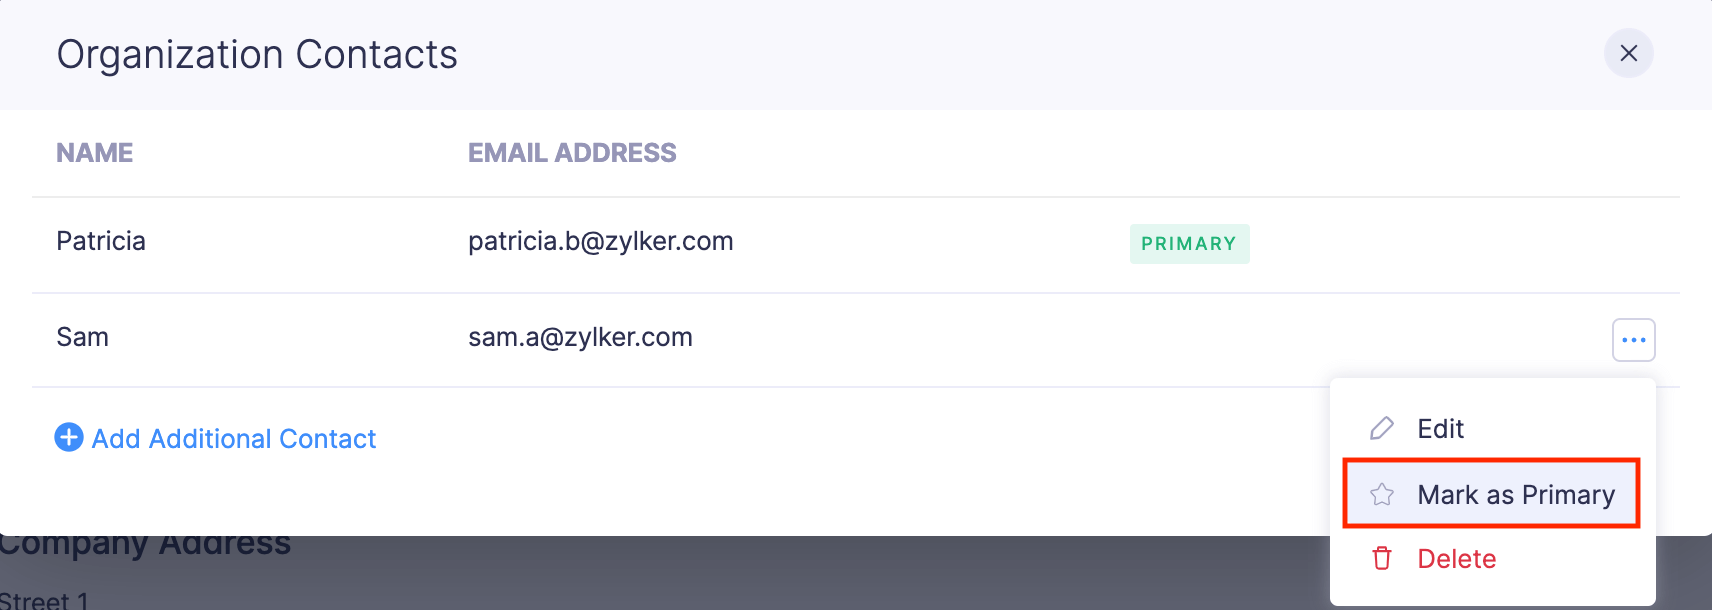
To mark the added user as a primary contact:
- Hover over the user and click the More icon.
- Click Mark as Primary. Your new contact will now be the primary contact and all the emails across the organization will be sent from this primary contact’s email address.
Organization’s Support Email Address
Add your organization support team’s email address to which users can send in their queries through the Contact Support form from within Zoho Expense.

Regional Settings
Here’s how you can configure the regional settings of your organization:
- Go to Admin View on the left sidebar.
- Click Settings on the left sidebar.
(OR)
Click Settings in the top right corner of the page. - Click Organization Profile under Organization.
- Scroll down to Regional Settings.
You can configure the basic settings of your organization in this section.
- Base Currency: The base currency is your organization’s default currency. You can choose the base currency with which all your accounting is done. You cannot change the base currency once a transaction is created using it. You can also manage currencies efficiently using the Manage Currencies option right next to the base currency text field.
Note: To change the base currency of your organization, you will have to delete all the transactions recorded using that currency.
- Fiscal Year: Choose the accounting year of your organization.
- Language: Select the language with which you want to use your Zoho Expense organization.
- Time Zone: Change or edit your time zone.
- Date Format: Change or edit the date format according to your requirements.

Branding
Give a personal touch to your Zoho Expense account. Choose a theme that will go well with your company. To change the theme:
- Go to Admin View on the left sidebar.
- Click Settings on the left sidebar.
(OR)
Click Settings in the top right corner of the page. - Click Organization Profile under Organization.
- Navigate to the Branding tab.
- Upload your organization’s logo that will be visible in the PDF of your expense reports.
- Choose a theme of your choice. If you have multiple organizations, you can differentiate them by using different themes.
